I’ve looked for the best computers built into desks and I’ve settled on a few ideas which I want to share with you. If this is something that appeals to you, a desk that can be customized can be a good place to start.
For the purpose of this article, I won’t get into the details of the PC components as it would be too difficult to follow.
You’ll find out how to put the components together, once you’ve decided on them for your own built-in desk computer.
Since my budget is limited, I only looked for inspiration with other gamers who use small desks. I want to see how the projects look like and if my budget allows it, I’ll build a bigger one as well. Here’s how I see the project.
- Create a list of the tools needed
- Buy the cheapest workable desk
- Build the project
* I’ll also give you the best built in computer desk alternatives
Computer in desk DIY – what you need and how to proceed
Since I have easy access to a Micke desk, I settled on the following video as a summarized guide as to how to prepare the desk.
Here are the tools and accessories you need, if you’re planning this project yourself.
- A small Ikea Micke desk – you can check it out here on Amazon!
- An L-shaped ruller –
- A power drill with drill bits –
- 16mm circular saw –
- 35mm bits –
- A jigsaw for 12cm fans –
- A hot glue gun –
- A 4mm plywood (reinforcing drawer) piece
- A manual saw –
- A staple gun –
- Plywood glue –
- An L-shaped aluminum bracket (to fill in the gap from lowering the shelf) –
- Disposable sweatband foam tape –
If you’re not after a custom-built computer desk, you can easily start off with Ikea’s Micke. It will also save you a few hundred dollars. Here’s another video of the same desk used in a different built-in computer setup.
- Figure out a component position in the desk’s drawer
- Drill the holes for the power cable and for ventilation
- Set up the wires
Best Computer built into a desk – start with these desks for something special
At the moment, there are not too many desks which could hold a built-in computer to choose from as many are do it yourself type of projects. However, the following desks can be used for such computers either as they are or with small tweaks.
- Flash Furniture Brettford Desk with Tempered Glass Top
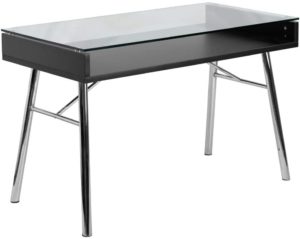 With 10mm tempered glass, Flash Furniture’s Brettford desk can be one of the interesting options for a built in computer desk. The glass is one of its main features as it resists high temperature and it allows all the PC components to be visible. With plenty of space within, it can also hold lights to be visible during the night.
You need 2 wooden slabs to close the front of the table. It would have to be solid materials to match the high-quality materials the desk already comes with. Among them, its chromed legs are known for the high-quality finish. You can check it out here on Amazon!
Assembly tips
- Keep in mind the desk is 47.25 W x 23.625 D x 30.313 H in.
- You need to fill the 3 and 5/8” of the side panels to glass gap
- To close the front side, you need a wood or glass piece with a length of 45.25″
- You need one of the power tools listed above to drill power cable and fan holes
- The setup is quite heavy at 80 pounds
- ZENY Glass Top Adjustable Drawing Desk
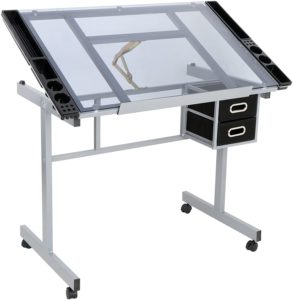 This desk is made for drawing but it’s weird or unusual design is going to be perfect for a computer project. You can build the entire setup right underneath its glass top, as this guy does with his standing desk. The difference is you will be able to see the computer’s components.
The desk comes with a 60-degree tilt which means you’ll be able to photograph it from different angles and get the envy of the gaming community. Since the entire setup is based on casters, you’re going to easily install all the components closer to a window or a light source and then slide it into its final position in the room.
With tempered glass construction, you’d easily install illumination strips underneath the desktop as well. Made with a 99lbs weight capacity, there’s sufficient strength to add the heaviest components. You can check it out here on Amazon!
Assembly tips
- 25” length X 24“ width X 31.5“ height
- Not a height-adjustable desk, only a tilt desk
- Storage options with 2 drawers and accessories space can be an advantage
- Z-Line Claremont Desk
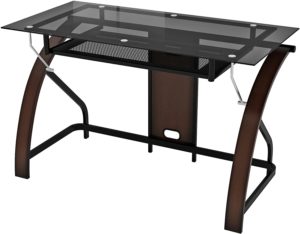 The same principles can be used on the Z-Line Claremont desk. Users would still need to attach the components underneath the tempered glass. The desk with built in a computer can be one that shows all components properly, just as in the examples at the end of this article.
If you don’t like the idea of crystal clear glass, this might be the right alternative for you. Made with smoked glass, it reduces some of the transparency of the materials which means the components are going to look even better.
There’s a pull-out keyboard tray underneath the desk. This offers 2 options to mount the components. You can do it right on the keyboard tray or underneath the glass. Ideally, you’d mount it underneath the glass to minimize dust build-up.
Made with real wood legs, this desk is also elegant. It might be difficult to pull out a proper project which also looks elegant, but it doesn’t get any closer than in the case of the Claremont desk. You can check it out here on Amazon!
Assembly tips
- Its size is 24 x 47 x 30 inches, plan cabling accordingly
- The keyboard tray is 24.7in above the ground
- The keyboard tray measures 25.5″ X 12″ and it sits 3.5” below the tempered glass
- Not that heavy at 46.5 pounds
- Techni Mobili Compact Computer Desk with Multiple Storage Options
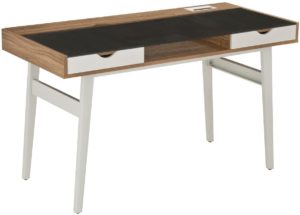 I like this desk very much and it’s going to be my next project which I plan to sell on a classifieds website as it’s the most commercial like a project of a custom-built computer desk which doesn’t look like an overkill.
The tempered glass is flanked by to lateral drawers which gives you some options. You can remove the backside of the drawers and leave them as they are installing the components on the desk’s sides. But you can also install the components underneath the tempered glass un the middle of the desk, leaving the drawers for storage.
A cable management space is added at the back of the desk and the best part is that it uses an opening cover. There’s plenty of space here for all types of PC components. With an overall weight capacity of 80lbs, there’s plenty of room for the best components. You can check it out here on Amazon!
Assembly tips
- Made from PVC, MDF, tempered glass, and PVC veneer
- Heavy at 94lbs
- It measures 51in width X 23.5in depth X 30in height
- You need a screwdriver to install the shelves
- You also need a drill as listed above to make holes for cables and fans
- The legs are made out of steel, not wood
- The 2 drawers are 15in wide
- The center space between the 2 drawers is 19in wide
- The height of the drawers is 4”
- OneSpace Easy Assembly Black Glass Writing Desk with Brushed Aluminum Frame
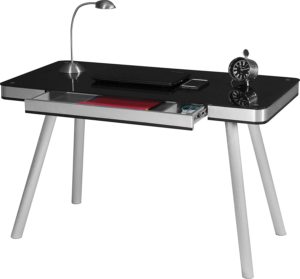 This desk is mainly recommended for those who want a different approach. Computers built into desks don’t necessarily need see-through glass. This is where the OneSpace desk comes in.
You have a bottom drawer that can be modified or removed to make room for your PC components. Standorsit.com recommends drills which are aluminum-capable.
Available in cool blue and black glass options, the desk is ready to offer a complete solution with one of the easiest assembly processes compared to other designs on the list. You can check it out here on Amazon!
Assembly tips
- 6 x 47.2 x 28.7in size
- The drawer is made with an aluminum face
- The bottom of the drawer is made from particleboard
- The drawer size is 26.75 X 11.75 X 1.5in
- Hydra Desk
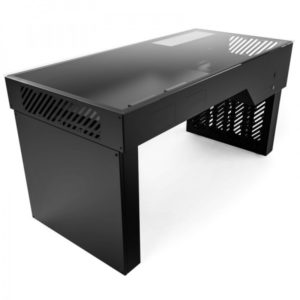 The ready to assemble Hydra Desk is a popular choice for gamers today. The desk with a computer built in capacity offers one of the most attractive designs and social media channels are filled with its DIY projects.
The desk’s components are quite large. You will need a pair of helping hands assembling it, unlike with most other desks. However, once assembled, it’s very efficient at cooling which is based on its large fans’ capacity and on its heat-dissipating 1.5mm aluminum frame.
Once assembled, I think the desk looks fantastic. Since it’s all black, you will need to install some lights to bring it up to life and admire your components. If you like the desk or if you want to learn more about it, you can check it out here on Amazon!
Assembly tips
- You need the patience to install the cable for the power supply
- Not all mounting screws are included in the pack
- It supports water-cooling with up to 4 coolers in the right leg
- The most expensive option
- It has the dimensions of 1509 x 755 x 713 mm and it weighs 49kg
- It uses 8mm tempered glass
- Supports up to 20 x 120mm fans
- Motherboard supports up to support up to E-ATX
- Vector Desk
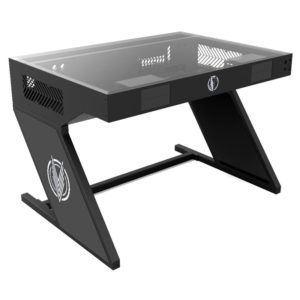 If you don’t like to get your hands dirty, you can always choose a Vector desk. Also made with an aluminum chassis, the desk comes with pre-drilled holes. Practically, there’s nothing to do to the desk as you can simply start adding the components in.
There’s a Vector Desk Mini, a Standard Vector desk, and Vector Benchcase. The Vector Desk is not the most affordable option to create a computer built into a desk. But it is the easiest method to create the project.
Assembly tips
- Assembled in Malaysia
- Made with high-quality components
- Compatible with Mini-ITX, E-ATX, XL-ATX, ATX, and Micro-ATX motherboards
- Rather heavy at 55kg
- Dimensions of 110cm with x 75cm height x 80cm depth
How to turn your existing computer into a built-in desk computer
If you’re on a tight budget and none of these options appeals to you, there’s always room for creativity. This guy is turning his existing desk into a built-in computer desk by making a hole in it and simply attaching his computer. You can find his tools in the list at the start of the article
Final considerations
A computer built into a desk is not going to be a quick project. You need proper planning, the right tools, cables, and extensions. If you don’t have basic power tools at home, you’ll need to buy them as well. The good part is that you can use these tools for the rest of your life on any other project around the house.
FAQ
How do I turn my computer into a desk?
You do this by following simple computer layout principles. Your main priority is to keep the system stable, functional, cool, and dust-free. You can follow the links in this article for all types of computesr built in a desk projects.
How much does it cost to build a computer desk?
It would cost next to nothing if you’re drilling a hole in your desk and attaching your entire computer to it. It can cast up to $500 if you work with a standard desk. Most people pay up to $1000 for a new desk and components.
What kind of wood should I use for a computer desk?
If you’re creating a custom computer desk, feel free to look at What Is The Best Type Of Wood To Use For A Desktop post.
Is plywood strong enough for computer built into a desk?
Plywood is OK for a computer built into a desk. You can always use reinforcements to add more support in key areas, such as in the middle of the desk where the hands of the user sit most of the time.
Super happy with how this all turned out, one more piece of rgb going into there. Simply to hold the graphics card lmao. #pcsetup #twitch pic.twitter.com/LMk98QuDRQ
— Tyson Phipps (@TDPhippsy) April 28, 2020

